Showing posts with label Techniques. Show all posts

May 1, 2013

Art Quilting Studio Magazine Article

Back in 2009 I did this quilt titled "Urban Sprawl".  It depicts my interpretation of our changing landscape due to urban sprawl.  I have been honored with this quilt being featured, along with an article about my interpretation and techniques when making this piece, in the Summer issue of Art Quilting Studio Magazine.  This Magazine is part of the Stampington & Co.   I am so excited and did the final proof last week.
If you can,  pick up the summer issue June 1 and "read all about it"!  

Sep 15, 2012

Quilt Exp 2012

As you know I promised you photos from Wisconsin's Quilt Expo 2012 a few days ago.  Well here they are.  I am sorry but I don't always take a photo of the entire quilt but only the technique I am interested in or a friend may be interested to see.
It was really good show this year and this is only a sampling.  They seemed to have finally gotten better at who they are allowing in the show.
Here is are the alphabet quilts made by the same artist.  Her workmanship is outstanding.

 Do not know who this lady is but the quilt was surrounded and I just had to squeeze in to get a photo.
 The always beautiful Baltimore Album Quilt.  This one was LOADED!
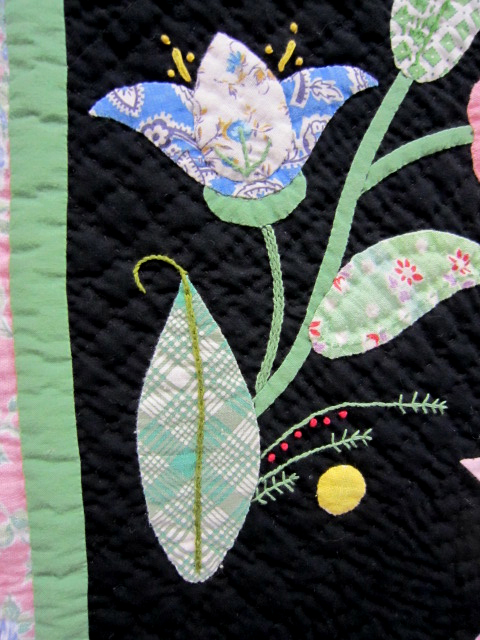
 I like this basket quilt because of the way they did the flowers and stems.  Evidently the judges did too.

 I loved the button bottom on this quilt.  Those are two hands on the lower left side releasing butterflies and petals.


 Embroidery on this quilt added alot and I though Debra would enjoy this.

Linda Roys Unbelievable quilt this year.  She is amazing and even though she wins each year, usually best of show, she did not this year and I thought she should have.


 Wished I knew the artist for this one.  It was a winner so I will look her up once they get their website updated.  Loved this piece.


Some more embroidery used on a quilt.  Just for you Debra.

An old fashioned looking basket quilt but Oh my the quilting on this one.

Beautiful Stars

A wonderful fish and turtle quilt.  There was lots of sparkle added to it too. Love how she did the water.


 Another beautifully constructed quilt with outstanding quilting.


 This is a full view of the alphabet quilt show at the beginning of this post.  I had to go back and get it.  Still people standing right in front though.
So that is all the photos I took.  There are many more beautiful ones there and everyone who entered should be proud of their accomplishments.

Here is what I have spent my time on!   These muffin top pin cusions in zinc canning jar covers which will be for sale on Etsy.  I salvaged some blocks off of an old quilt that had been used in the back of a pickup truck or something and was torn and stained but several of the handsewn blocks were still in good shape.  Each time I made one I thought of the woman who worked so hard hand piecing all these one inch squares for hours and feel good that a few have been saved
for another life. 


Jun 25, 2012

Pears Ready to Quilt

 I made up my pears with their shadows and stems on my teflon sheet.  Once I was happy with them

 I layed them on top of my prepared background.  I knew I wanted them high and in the left had corner.  I did not fuse them down until I constructed the bowl since it was going to have to go around these shapes.

Once I was happy with my bowl I fused all of it down.  Whew!  That was an entire days work with the exception of taking a break to watch the second Sherlock Holmes Movie with Robert Downey Jr.
It was so good and I loved the ending.   Now I am closing up the studio since it is 8PM.

Quilting will begin soon.

Jun 24, 2012

Entry and Redrawing

 I have entered "Honorable Mention" into the Quilt Expo this year.  I hope he makes it.  I should know in a few weeks.  Cross your fingers.

 Back to work on "Pears".  I start out by redrawing my sketch on tissue paper so I can flip it over and have the reverse side to trace onto my fusible.   I pay attention to all the shapes of the shadows etc.
I know many fusers do this differently but this works for me and I continue to do it like this.  I think each of us have to choose our own techniques that we are comfortable using and have the most success with. 
Here is what my fusible will look like after tracing shapes all over it.   I number the ones I may not recognize once they are cut out.  I have very little trouble with fraying so once again I choose to
fuse my shapes onto my fabric choices, cut them out and then pull off the fusible later while I am constructing the object.  Sometimes I purposely fuse on a fabric that does fray to get a more earthy natural look.  In the case of Pears you do not want that "usually".    Never say never because you don't know what works from one quilt to another.

So with this rather tedious step finished I will start fusing and constructing my pears and bowl onto my background.

Dec 28, 2010

Return to Normalcy

Photo by Jeffrey Strobel

We are in a melt down right now.  The sun is out and we are supposed to get into the 40's in the next two days.   I plan on getting outside to take down the Christmas decorations while it is warmer because I know it will not last.

I just finished my "IT" piece.  I have been working on it for the last 2 days.  Things were moving along well and I did not want to stop the flow of creativity that I was feeling so I kept at it and put the binding on a few minutes ago.  Tonight I will sew on the sleeve on the back and it is finished.

Then I plan on returning to the Gouldian quilt and finish quilting that.  I am still unsure about the quilting on the birds so I will start with the leaves and branches and see how that affects the quilt and then decide whether to quilt them heavily or lighter.  In photos they do not have much feather texture and are 
sort of smooth and silky looking.  I am not sure how to get that look without adding too much texture.
Any ideas?

May 21, 2009

Success or Failure?

Had just a bit of time for trying some more discharging this morning. I cut a sponge in the shape of a petal and used that as a stamp rather than a brush like I did the last time. This time I used this commercial fabric in navy blue. On the printed side of the fabric you could only see a tiny bit of the discharging.

On the opposite side this is what it looked like. Much stronger on one side than the other and discharging to almost the same color as the black did. If you click on this photo (which is not focused well, sorry) you will see the pattern in the fabric came thru on the petals. Sort of interesting.


Then I took a purple crunched batik and did the same process for the same amount of time.
(For anyone new visiting I am using dishwasher liquid detergent as my discharge agent.)
There was a subtle difference and it was in keeping with the purple color of the fabric. Both sides were almost of equal value. I like that it is like this and I could see using this in a background.
I was execting it to change to a more blue or red but it did not.
Interesting the difference in commercial fabric vs hand dyed.

May 9, 2009

Layout

Did not have enought time to work on anymore discharging this morning so decided to download pictures of what I have so far and play around with it.
This is the first attempt at doing dishwasher liquid discharge. Very loose and free with brigter double discharged flowers fussy cut and pinned on top of single discharged flowers.

This is yesterday's discharged pieces with part of one (bottom row) fussy cut and fused onto the
coneflower one. I tried to be more controlled in painting on the detergent in these and did up to four layers.

Here is just the scrap piece of what was left after cutting apart yesterdays daisy piece. I think it almost stands on it's own.


Variation (cropped in photoshop) of total piece....is this layout better?


What about this layout? (also cropped in photoshop)

May 8, 2009

More Experiments


I thought I would continue experimenting this morning.
Here are the tools I used. Black fabric, different sizes of brushes and liquid dishwasher detergent.


Dipping the brush in the cap filled with the detergent you stroke it on the fabric in the design you want. I stuck with flowers. Daisies & Cone Flowers.


After rinsing this layer off I added another layer of detergent on top of the first one.


On the panel with cone flowers I put the third layer on the flowers and then began one layer of new flowers at the top.


Third layer on daisies.


Daisies finished.


Cone flowers finished, I added the bottom flowers after rinsing the top ones off for an even subtle grouping. The photos do not show the subtleness of this.

I am getting the hang of this now. I apologize for my poor photos but this goes fast and I had to shoot the pics fast and then rinse with each step. When I first started I had one piece of fabric dry and one wet. It did not seem to matter with how it discharged.
Next time I would like to try doing it with the detergent thinned out and more liquidy. Then I will do wet vs dry fabric and see if it bleeds more on the wet.


May 7, 2009

Experimental Time


While continuing the quilting on Mulberry and tweeking the Poppy quilt, I have been experimenting with doing some discharging with liquid dishwasher detergent and a brush on black fabric. I have been doing it in three different stages so far. First I left it on only until I could see some changes. Then I rinsed and dried and put it on again in some areas and repeated the same thing. Then I put it on again in some other areas and repeated. I decided to cut out some of the flowers just to see how they could be used in something. I still want to do one more discharge but I am sort of getting the hang of it and understand more how to handle the brush better and how long to leave it on to get the effect I want. You can see where it was put on too heavy and not feathered out well, but this is all experimental to prepare for the real thing.

Poor Barley was not happy with the thunderstorm we had last night. He just does not like it when it storms, poor guy. He looks at you like he is saying "do something!!!!" Barley is 6 years old and is a very special dog. He was rescued by my daughter and I and although he has quirky eyes and has a fear of storms, he is so lovable and sweet. Luckily the storm passed through quickly and he relaxed.
Related Posts Plugin for WordPress, Blogger...